
Unity
Sample project with example integration can be downloaded from: https://github.com/Nefta-io/NeftaSDK-Unity.
Requirements
Unity 2019.f.40 or higher
Supported platforms
- Android minimal version 5 (API level 21) or higher
- iOS 11 or higher
- Standalone Windows/Mac for development in Editor
Include the SDK
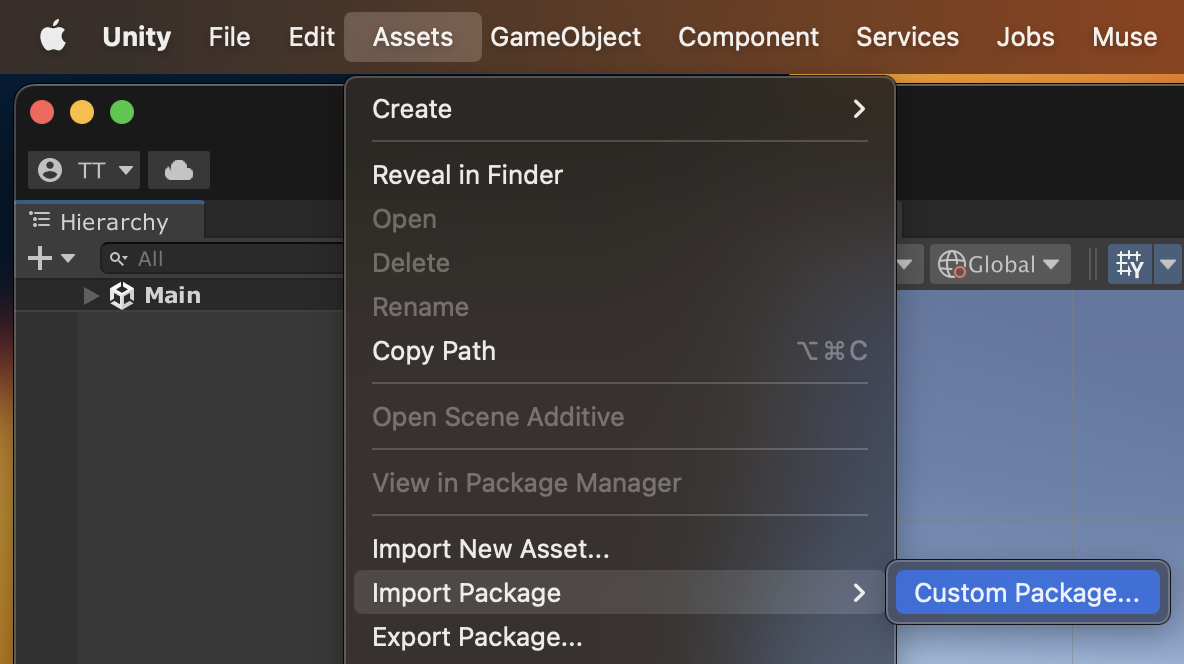
First download the latest package from: https://github.com/Nefta-io/suite-for-unity/releases and import it into your project through Menu > Assets > Import Package > Custom Package... and select the
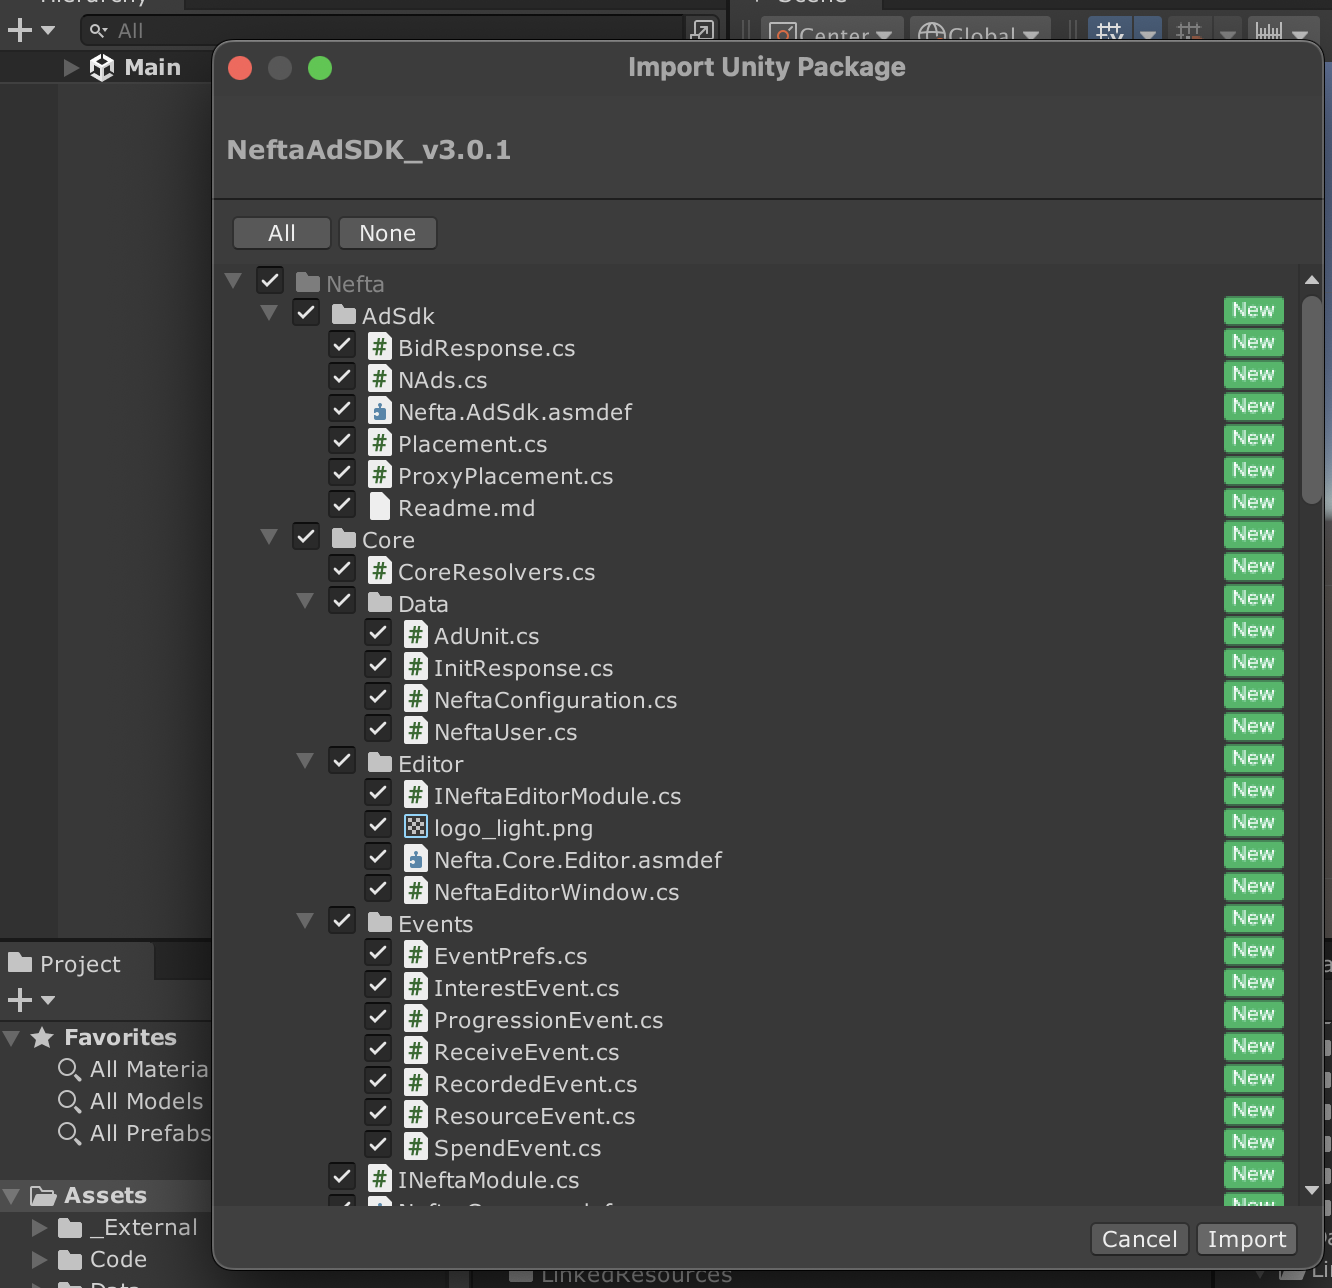
Confirm the import of all the files in the package:
Configuration
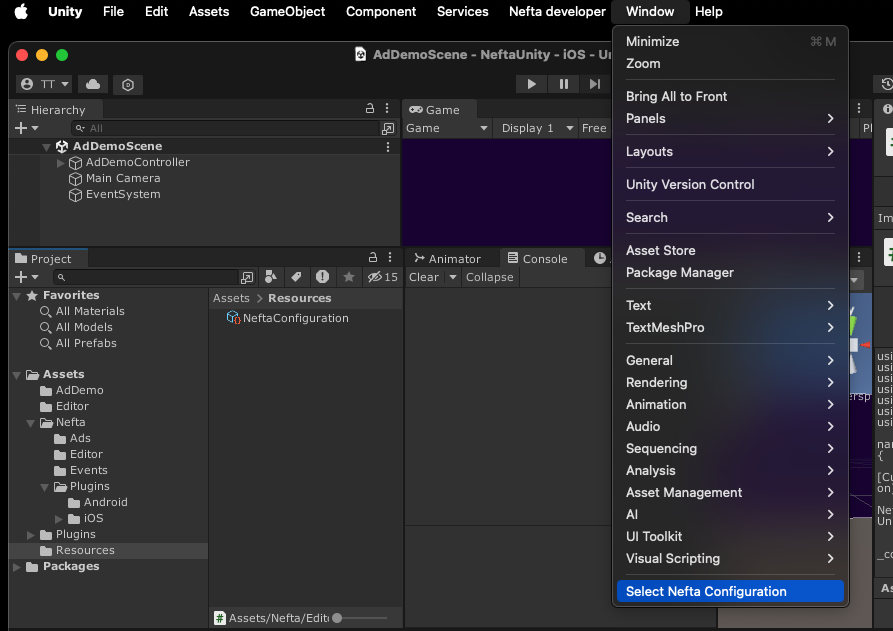
To connect your account to the project, enter your application ID from the dashboard open the Menu > Window > Select Nefta Configuration:
This will generate and select NeftaConfiguration scriptable object in the Resources folder:
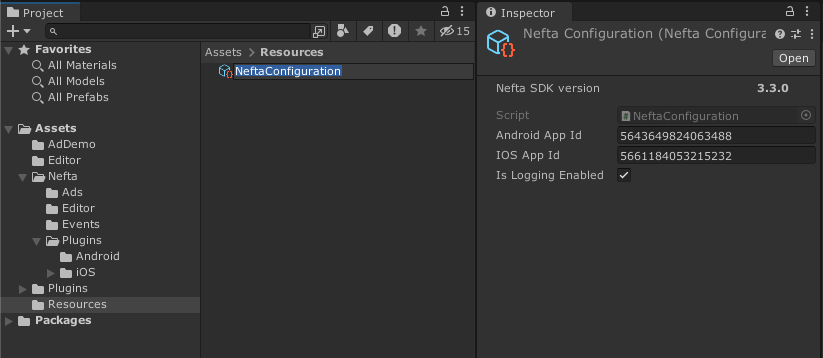
The toggling of Is Logging Enabled option will switch if either the debug or release (with the logging stripped out) version of the plugin is included in the build for Android. On iOS the same version of the plugin is always included and this flag controls if logging is enabled.
Additional configuration for Android
The last piece is to enable AndroidX libraries by going to Menu > Edit > Project Settings: Player tab:
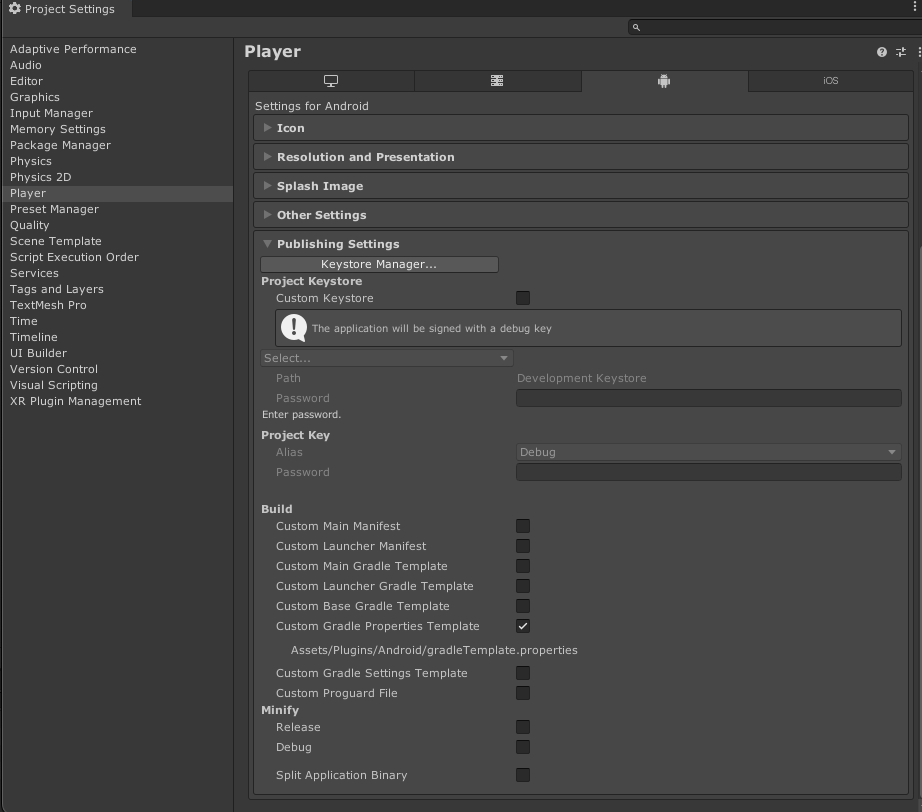
Enable Custom Gradle Properties Template and in the newly created file add the use of AndroidX libraries:
android.useAndoridX=true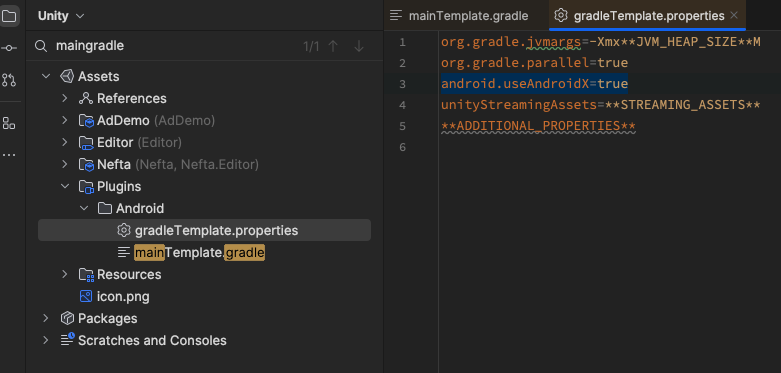
Code integration
It starts with the initialization of the SDK which should be done as soon as possible to ensure accurate event recording:
_neftaAds = NeftaAds.Init();If you want just the events this is all that is needed. You can proceed to the implementation of the actual events: Game Event Tags.
Additional parameters
For additional configuration, for example for configuring external test group, use:
NeftaPluginWrapper.SetExtraParameter(NeftaAds.ExtParams.TestGroup, "split-direct");Code integration - Ads
To start the ad logic and retrieve all the configuration (so that no resources are wasted in case you are not showing ads or you don't want them straight away):
_neftaAds.Enable(true);To enable communication from native to Unity make sure to call OnUpdate each frame. This is not done manually by the SDK, so you have complete control over the script execution order. Any callbacks from the native will be invoked after calling OnUpdate so you can be sure the callbacks won't be fired at random times during the frame:
public class SomeScript : MonoBehaviour
   private void Update()
   {
      _neftaAds.OnUpdate();
   }
}
This is the list of callbacks to which you can subscribe:
_neftaAds.OnReady = OnReady;
_neftaAds.OnBid = OnBid;
_neftaAds.OnLoadStart = OnLoadStart;
_neftaAds.OnLoadFail = OnLoadFail;
_neftaAds.OnLoad = OnLoad;
_neftaAds.OnShow = OnShow;
_neftaAds.OnBannerChange = OnBannerChange;
_neftaAds.OnClick = OnClick;
_neftaAds.OnClose = OnClose;
_neftaAds.OnUserRewarded = OnUserRewarded;
Bidding
In case you have just one Ad SDK or don't want to deal with header bidding you can skip this step.
The load function will bid and load an ad for you in the background.
You bid on a specific placement with this function:
NeftaAds.Instance.Bid("4922960754245632"); // bid by id

NeftaAds.Instance.Bid(Placement.Type.Interstitial); // bid by type
After which the OnBid callback will be fired with the price of the available ad or null if there is none. It is up to you to decide if you want to proceed and load this one, make another bid, go with an ad from another provider, or something else.
Loading and showing of an Ad
Before we can show an ad, we have to load it. We have two options for that. We can either load specific ad unit by its ID or type:
NeftaAds.Instance.Load("4922960754245632");
// or
NeftaAds.Instance.Load(Placement.Type.Interstitial);
After the ad loads the the OnLoad (or OnLoadFail) callback will be made. At that point IsPlacementReady function will start returning true:
NeftaAds.Instance.IsPlacementReady("4922960754245632");
// or
NeftaAds.Instance.IsPlacementReady(Placement.Type.Interstitial);
At this point, we can show the ad:
NeftaAds.Instance.Show("4922960754245632");
// or
NeftaAds.Instance.Show(Placement.Type.Interstitial);
Banner Ad Specifics
The easiest way to work with banners is to just toggle them on or off with the following function:
NeftaAds.Instance.EnableBanner(true);With this, the SDK will take care of the constant loading and showing banner placement to maximize your earnings from this position.
Whenever the banner presentation changes (gets shown, hidden, or changes size) you will get a OnBannerChange callback with covered width and height in physical pixel size so you can correctly offset application visual elements if needed.
Video Ad Specifics
After watching the rewarded video placement till the end, the OnUserRewarded will get fired so you can reward the player.
Miscellaneous
In case you want to set a custom identifier for the current player, which will be sent alongside BE calls:
_neftaAds.SetPublisherUserId("player23");You can verify the correct SDK behaviour through logs: Testing
Troubleshooting
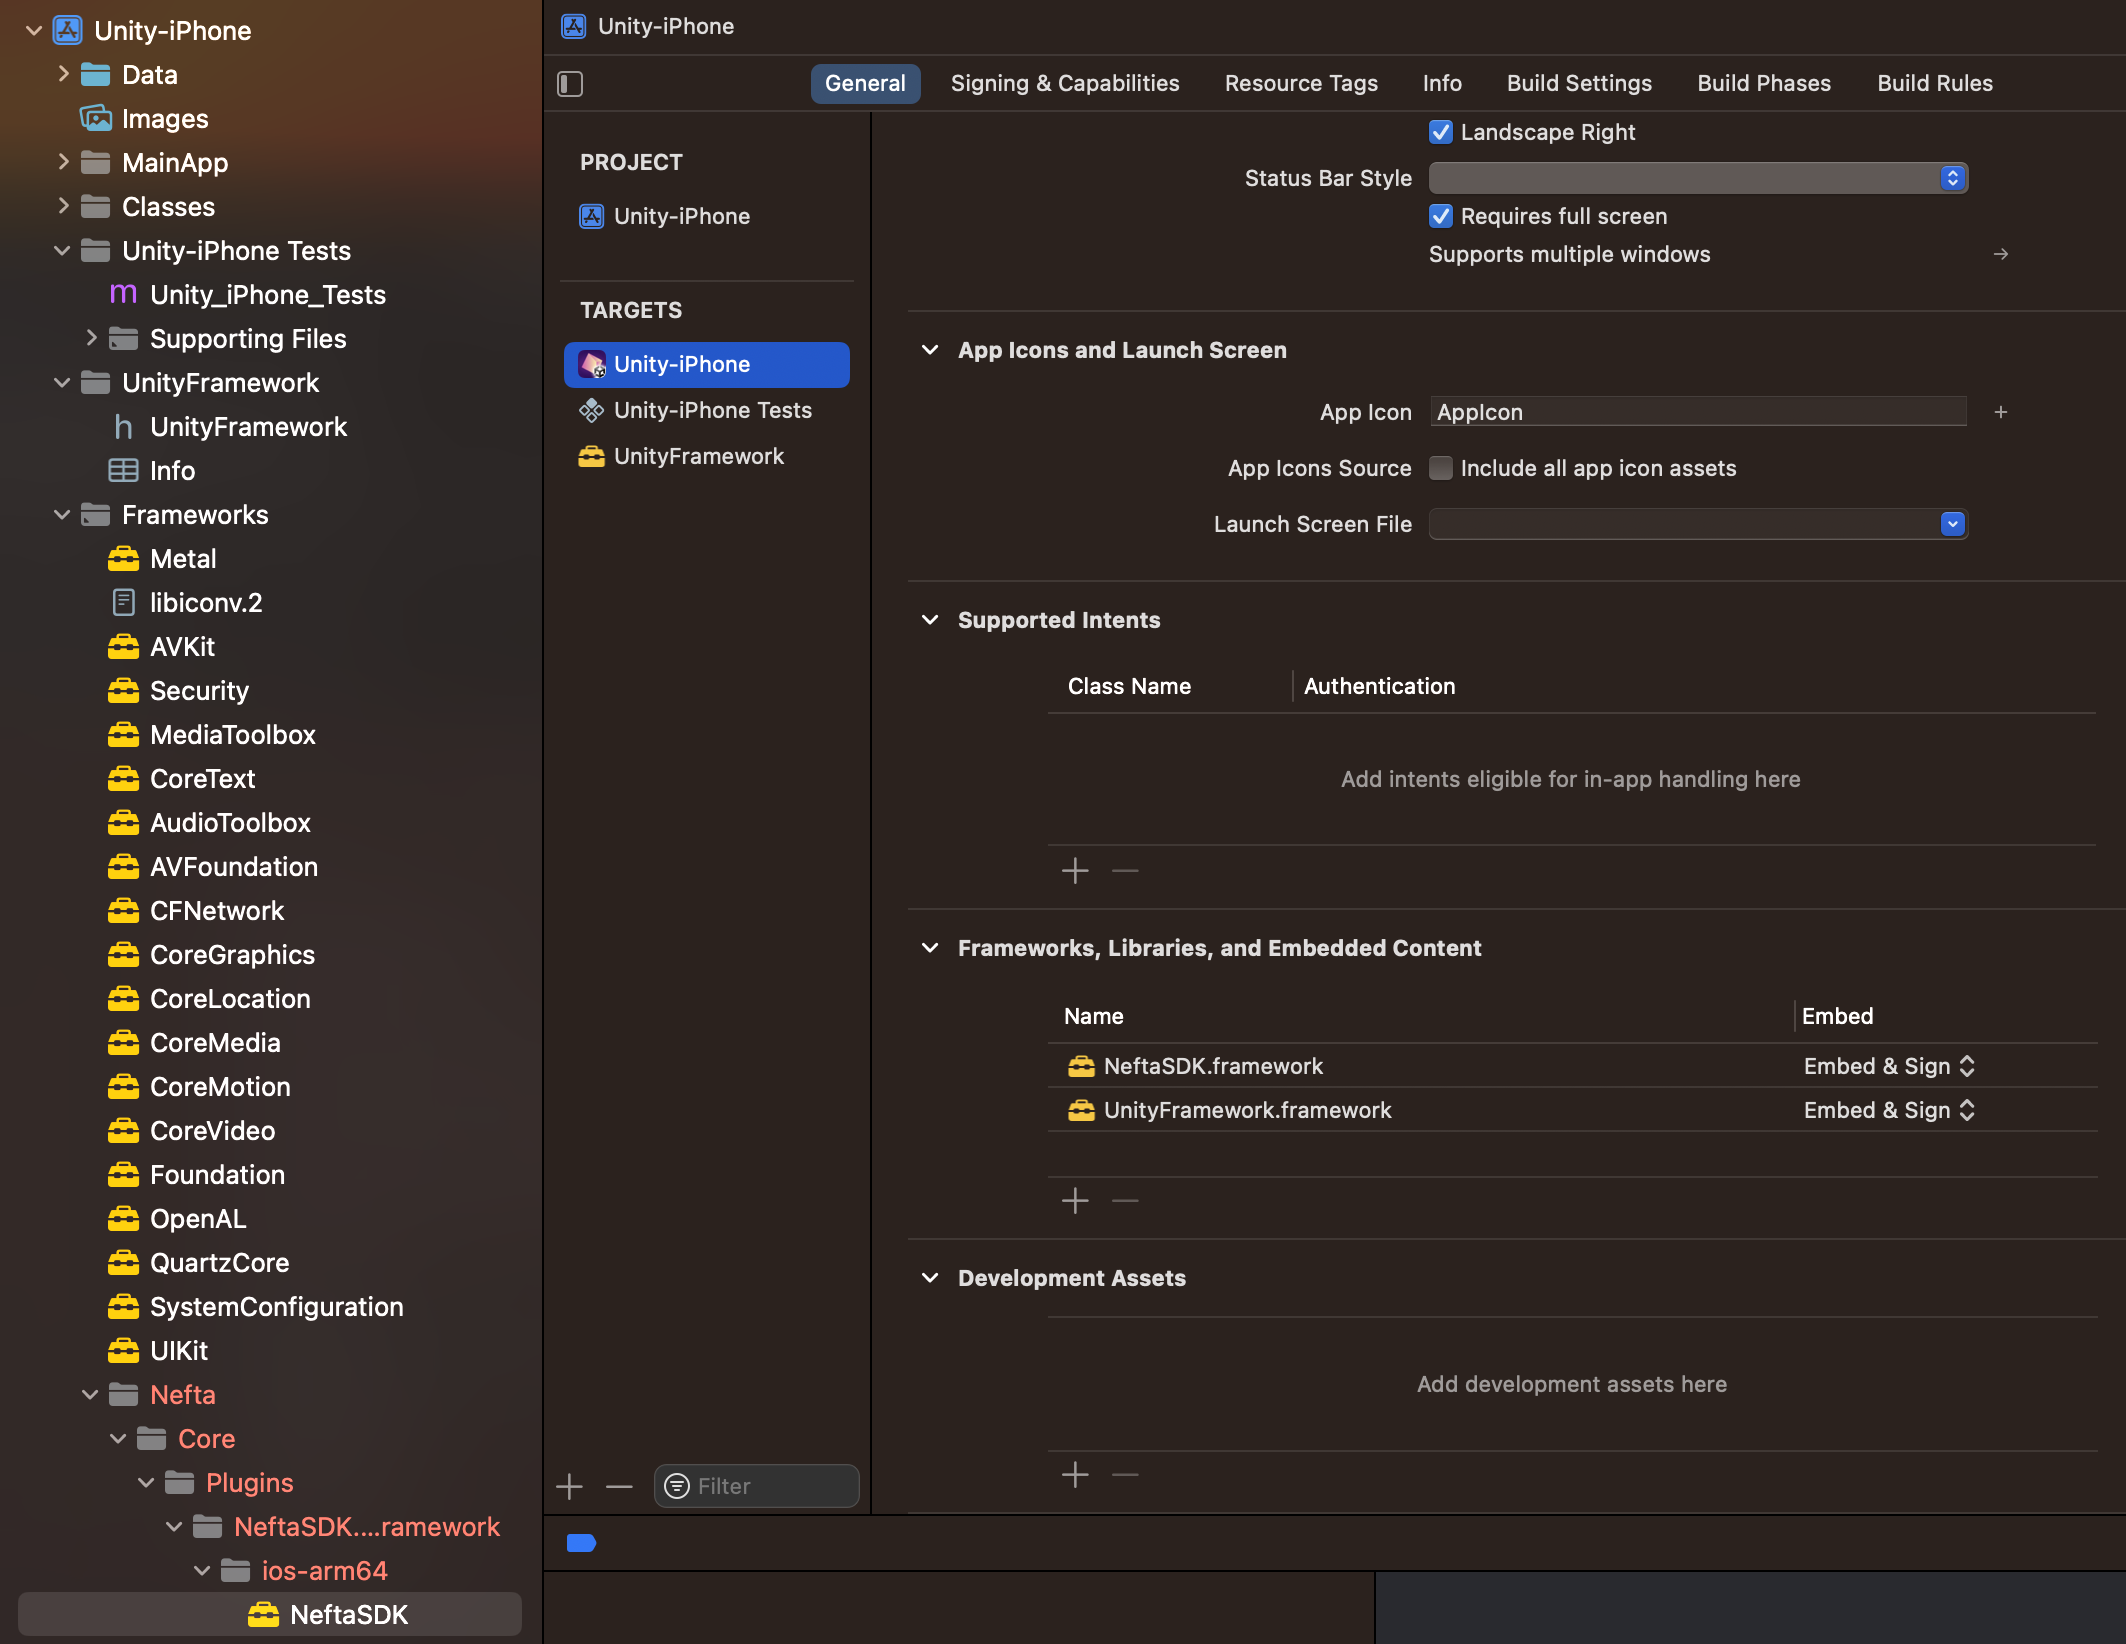
On iOS frameworks should be already configured okay out of the box, but in case you have any issues with them, make sure that you are including the correct SDK based on your target, so either the arm one or the simulator x64 one:
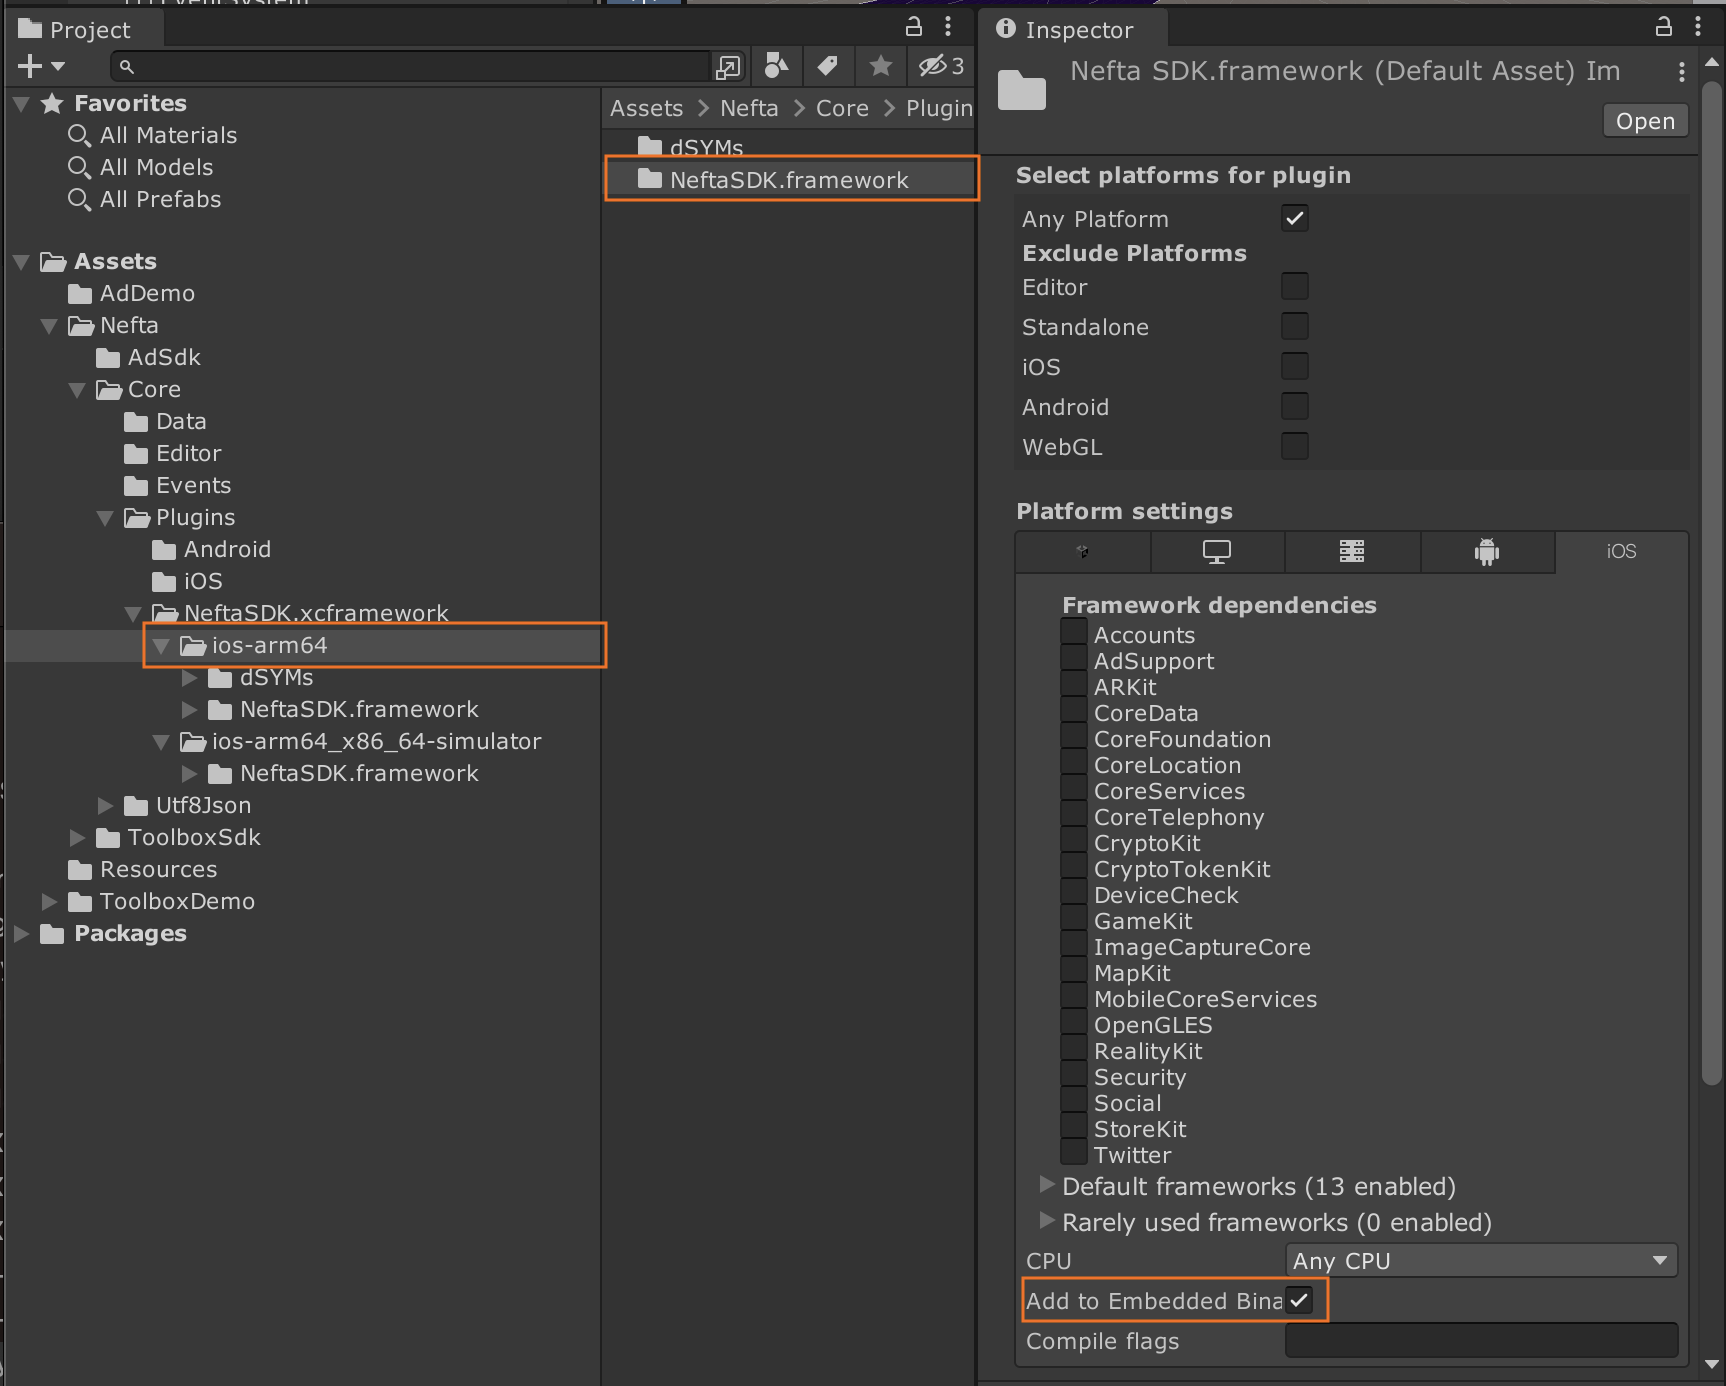
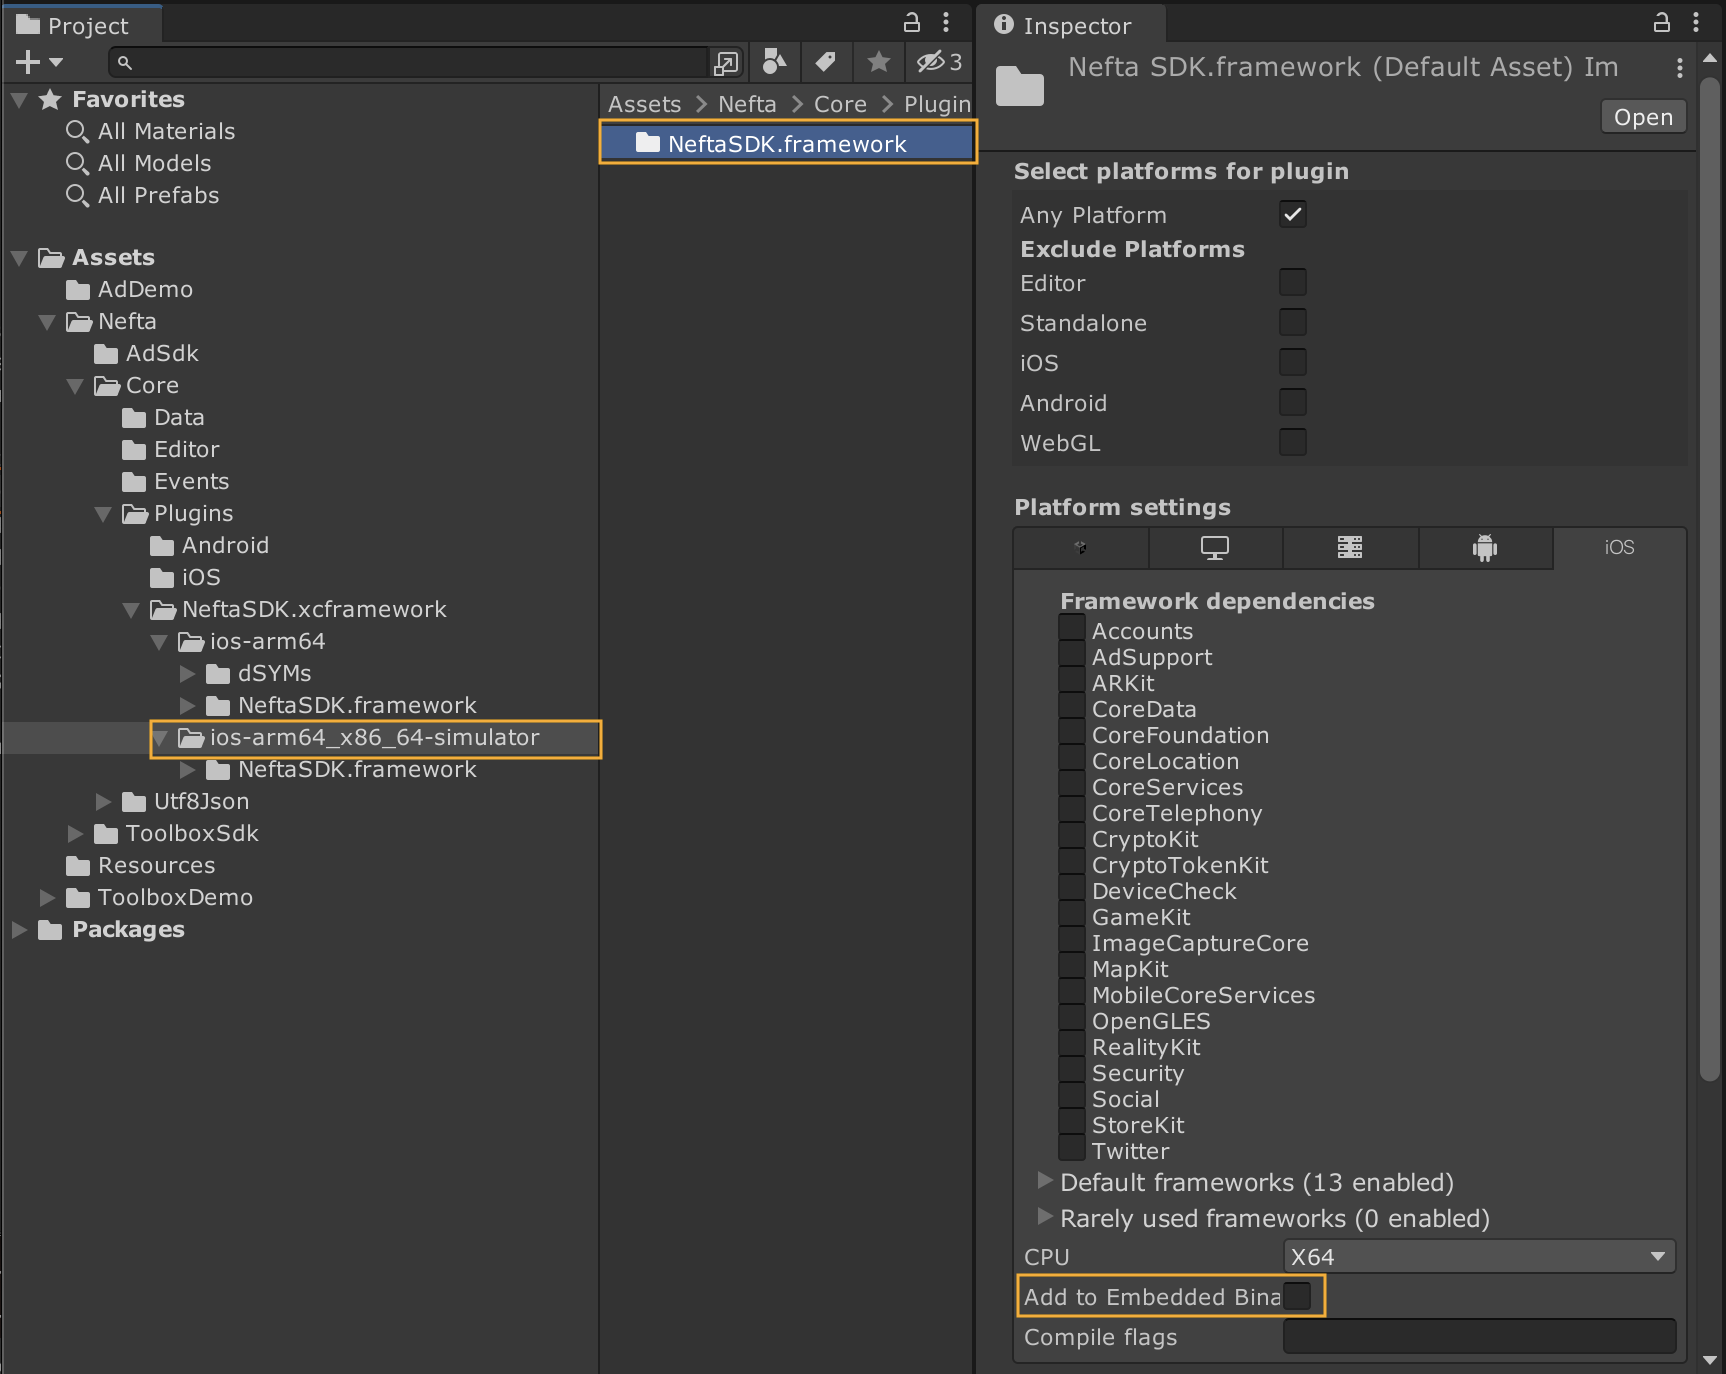
So that you have only one NeftaSDK in the Xcode project that is Embedded & Sign:
After integration:
- Ensure the app has integrated the "Game Events": Nefta Game Events
Updated 7 months ago