
MAX - iOS
Based on the MAX demo project: https://github.com/AppLovin/AppLovin-MAX-SDK-iOS you can check the Nefta custom adapter integration example here: https://github.com/Nefta-io/NeftaMAXAdapter.
Include the SDK
CocoaPods
To integrate Nefta SDK for MAX Mediation add the following to your Podfile:
pod 'NeftaMAXAdapter'Run the following command:
pod install --repo-updateSwift Package
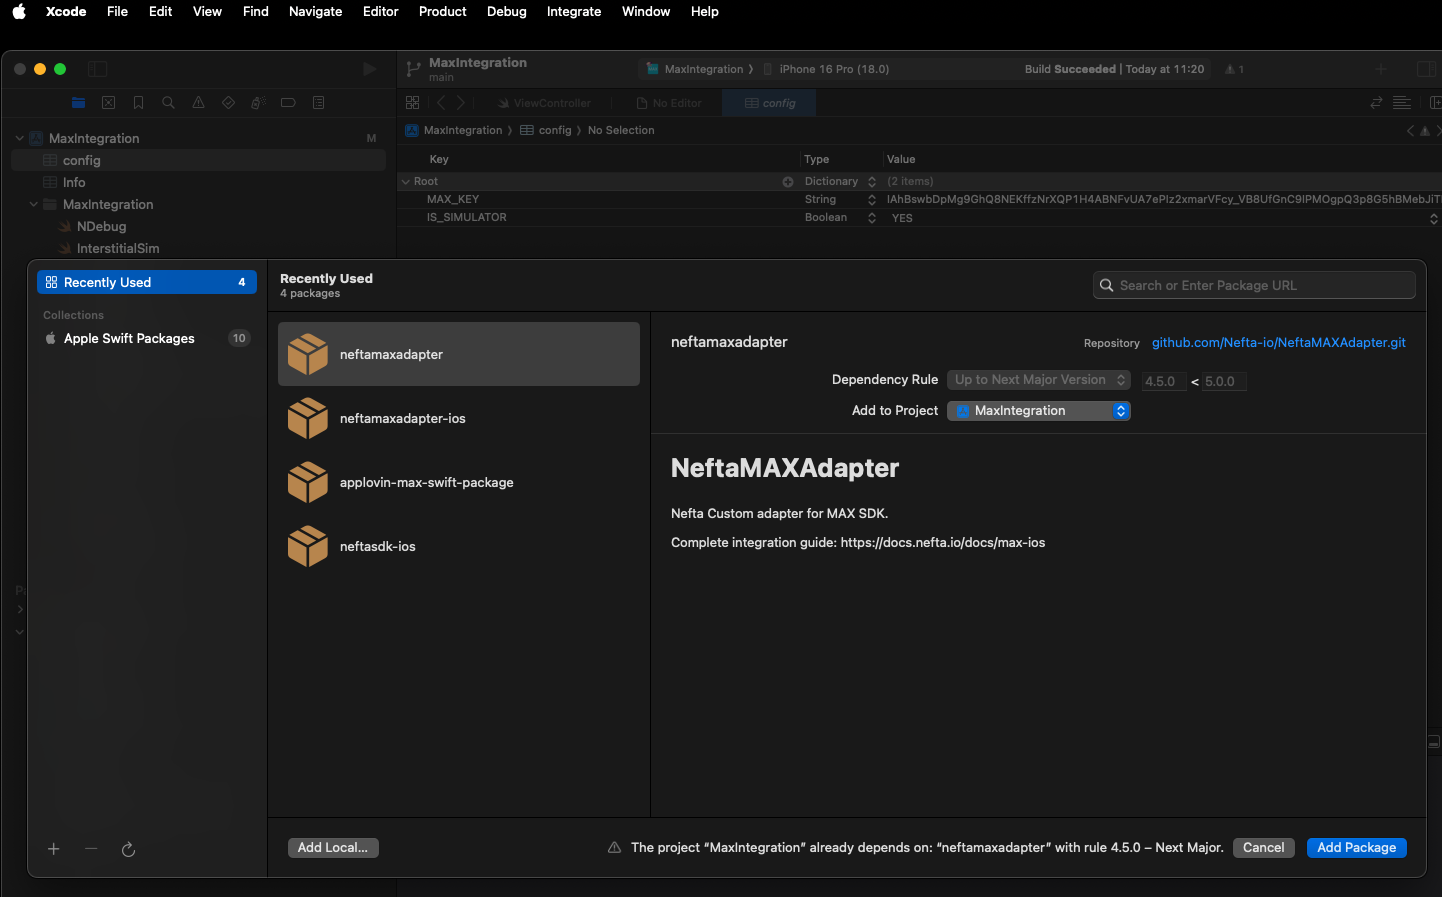
File > Add Package Dependencies ... and enter repository: https://github.com/Nefta-io/NeftaMAXAdapter.git
Manually
Or you can integrate it manually: https://docs.nefta.io/update/docs/manual-integration#/
Code integration
Plugin initialization should be done as soon as possible (for accurate session tracking) with:
import NeftaSDK

ALNeftaMediationAdapter.Init(appId: "5661184053215232", onReady: { initConfig in
	print("[NeftaPluginMAX] Initialized, nuid: \(initConfig._nuid)")
})
#import "NeftaAdapter.h"
[ALNeftaMediationAdapter InitWithAppId: @"5661184053215232" onReady: ^(InitConfiguration *initConfig) {
NSLog(@"NeftaPluginDI Initialized, nuid %@", initConfig._nuid);
}];Updated 2 months ago
Did this page help you?